On the User Interface Setup tab you specify the tabs, sections, fields and subfields to be displayed in borrower registration.
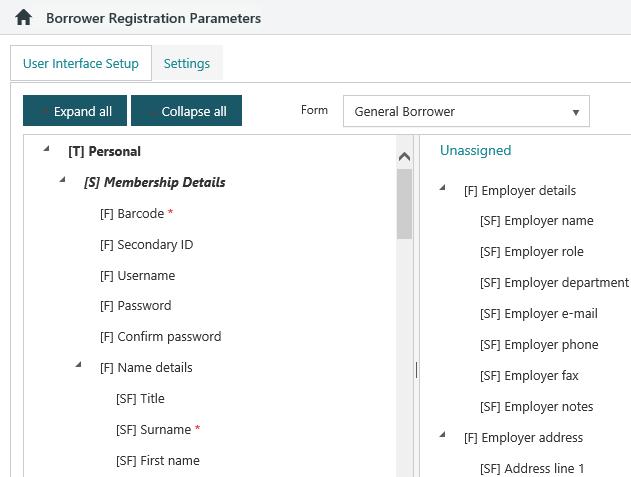
- T stands for "Tab" and refers to the tab name in the borrower registration details, e.g. "Personal".
- S stands for "Section" and refers to each section, e.g. "Membership Details".
- F stands for "Field" and refers to the individual fields within a section, e.g. "Employer details".
- SF stands for "Subfield" and refers to the subfields within a field, e.g. "Employer name".
To edit the tabs, section, fields or subfields you see in borrower registration:
- From the module menu select Maintenance > Circulation > Borrower Registration Parameters.
- Select the Form you want — general, institution or quick registration.
- Set up the user interface (see below for details).
- Click Save or Save & Close.
Adding, deleting and moving tabs, sections, fields and subfields
You can click and drag a tab to move it before or after another tab.
You can click and drag a section to move it to another tab.
You can click and drag a field to move it to another section.
You can click and drag a subfield to move it above or below another subfield in the same field.
To include a field in the registration details, click and drag it from the Unassigned list to a section.
If you don't want a particular field to be displayed in the registration details, click and drag it to the Unassigned list.
If you don't want a particular section to be displayed in the registration details then select the section, click Delete and then click Yes at the confirmation prompt. If there are any fields and subfields in the section then these will automatically be moved to the Unassigned list.
If you delete all the sections on a tab then the tab will not be show in the registration details. You can also delete a tab if you wish — select the tab, click Delete and then click Yes at the confirmation prompt. If there are any fields on the tab then these will automatically be moved to the Unassigned list.
To add a new tab, click New Tab and then type a Description.
To add a new section, click to select the tab you want, click New Section, and then type a Description.
Description
For tabs and sections, the Description is the text you'll see in borrower registration.
For fields and subfields the Description is read-only.
Label
This is the text you'll see for the fields and subfields in borrower registration.
Read privilege, edit privilege and privacy
You can use these options to control access to a field.
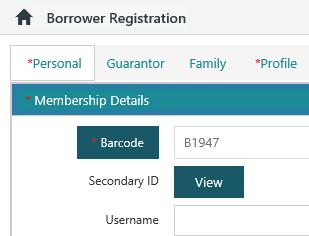
The Read privilege and Edit privilege are compared with the staff member's Circulation privilege level. Let's see some example using the Secondary ID field. For staff members with sufficient read privilege but insufficient edit privilege, the field will be disabled.
For staff members with insufficient read privilege but sufficient edit privilege, the field will be displayed without data but can be edited.

For staff members with insufficient read and edit privilege the field will not be displayed.
If you select the Privacy option then the data in the field will be visible or editable based on the user’s privilege.
Mandatory and mandatory message
Some fields and subfields are mandatory by default.
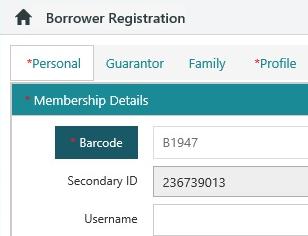
- For general borrowers and quick registration — barcode, surname, location, category and registration expiry are mandatory.
- For institution borrowers — barcode, institution name, location, category and registration expiry are mandatory.
To make any other field or subfield mandatory select the Mandatory option. You can specify the text you want to show for the mandatory field/subfield in the Mandatory message.
Field Validation
Some fields in Borrower Registration allow validation based on logical expressions.
Validate Expression
If the Validate Expression field has a value in it, this expression will be used to validate field content. To disable validation, remove any expressions from the Validate Expression field. Alternative logical expressions may be implemented to validate field content if preferred.
Validate Error Message
This free text field contains the error message that will be displayed if the field content does not meet the rules of the Validate Expression.
Contact numbers
From Spydus server 10.2 and forward, contact number validation is enabled by default. The default Validate Expression (^[0-9]*$) requires that the field contain eight characters, and may only numerical characters (0-9).
e.g The following field values would pass validation:
- 0391231234
- 0401987654
And the following values would fail:
- (03)91231234
- 0401 987 654
To disable contact number validation (as with any other field validation) simply remove the logical expression from the Validate Expression field. Alternative logical expressions may be implemented to validate field content if preferred.
Enforce case sensitivity
|
This feature requires server version 10.7.1 or higher. |
Some fields (including name, address, email address) allow the case of the text in the field to be forced to a chosen style. For fields that allow case to be enforced, there will be a dropdown menu labeled Case, with up to four options:
- None - no case enforcement will be applied (he text will retain the case that it was entered in)
- Capitalise - also known as title case, selecting Capitalise will use upper case for the first letter of each word in the field
- Using Capitalise may result in some unexpected behaviour e.g. The surname 'De La Rosa' will be rendered as expected, but McDonald (being a single word) will be rendered as Mcdonald.
- Uppercase - All letters in the field will be uppercase
- Lowercase - All letters in the field will be lowercase
Hidden
Subfields cannot be dragged to the Unassigned list individually, so if you don't want a particular subfield shown in the registration details select the Hidden option.
Suspend Barcode
To add the suspend option to the registration details:
- Navigate to Maintenance > Circulation > Borrower Registration Parameters
- Select the relevant registration form from the Form dropdown.
- Drag and drop the Barcode Details field from the Unassigned list on the right to a Section on the left. This will automatically remove the current Barcode field from the Section. Repeat this for the other forms.
