The interface for marking attendance is designed to be used on a tablet — i.e. at the door to the event, using the tablet to mark attendance.
To take attendance, navigate to Events > Attendance > Mark Attendance. By default, sessions taking place today are shown, but other sessions may be added to the list.

Select the session, then click Mark Attendance.
If registration is required
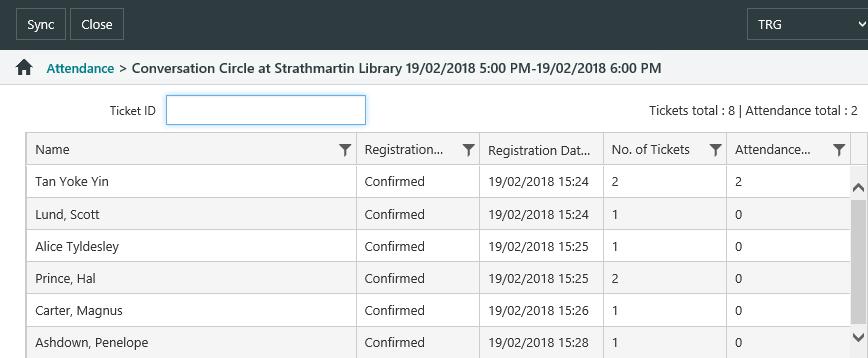
For sessions where registration is required, a list like the one below will be displayed.

Marking attendance is intended to be quick, so double-tap one of the registrants' rows to mark their attendance count as the same as their ticket count.
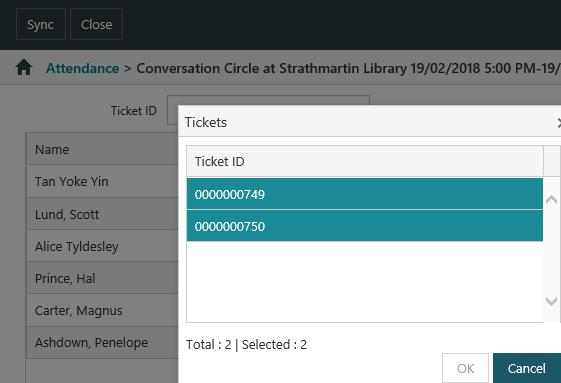
Double-tapping the name a second time will produce a dialog box to select the tickets that are being marked as attending. Select a ticket to include it in the attendance count.

Instead of double-tapping an individual name in the list, the ticket number may be entered into the Ticket ID field.
There is also a Sync button on the Action Menu. This might be used, for example, if there are multiple people marking attendance (e.g. multiple entry points and attendance being marked at each). Click Sync to synchronise the attendance count with the results from all users.
If registration is not required
Both registered borrowers and guests may attend Events that do not require event registration.
To add attendance records for registered borrowers:
- Scan the borrower's library card into the Barcode field.
- If a single borrower card is to account for multiple attendees, scanning the card again will increment the Attendance Count field. Repeat as required.
To add attendance records for those who are not registered borrowers:
- Click the Guest Attendance button in the action bar. This will add the Guest row to the attendance list.
- To add additional Guest attendees, double click the Guest row and increment the Attendance number as required.
Marking attendance at Events that do not require registration - Pre-10.5
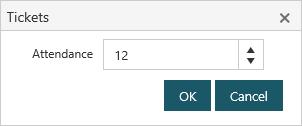
If marking attendance for a session where registration is not required, then a dialog to record the attendance count is shown.
