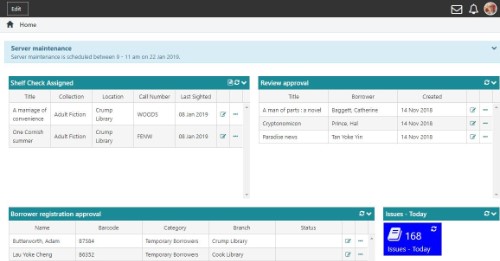
The Home page is the default landing page when a user logs in to the Spydus web apps. In the screenshot below, four widgets are being displayed to the user.
- Shelf check assigned items
- Reviews to be approved or declined
- Registrations awaiting approval
- Item issued today
There is also an Announcement about server maintenance.
Add widgets
To add a widget to the Home screen, the widget must be made available to the User Group to which to the user belongs. This must be performed by a user with access to the Maintenance module. This will produce a list of available widgets, and a search bar.
To add a widget to the Home screen;
- Search (by title) using the search bar, or scroll through the list, to find the widget.
- Either double-click the widget, or drag and drop it into the body of the page.
- Click Done.
Edit widgets
Widgets can be dragged and dropped to rearrange them on the Home screen. To enter Edit mode, click the Edit button in the action bar. Click and drag any widget to rearrange its position in the screen.
Grid widgets
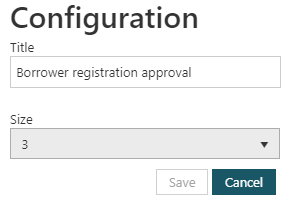
To change the title or width of a grid widget, click Edit, then  . Make the desired change, click Save, then click Done.

Tile widgets
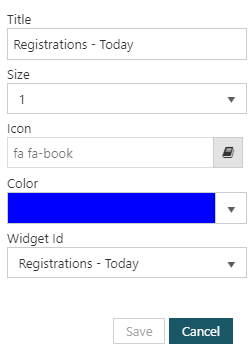
To change the title or width of a tile widget, click Edit, then  . Make the desired change, click Save, then click Done..
To add another tile to the widget, click the + button.
To change the icon or colour of a tile in the widget, click that tile. Make the desired changes, click Save, then click Done.

Delete a widget
To remove a widget from the Home Page, click Edit, then  and then click Done.
Widget options
Clicking on the title row will collapse or expand a widget. This setting will be remembered between sessions.
Click a column heading in a widget to sort the records in the widget on that column. Sorting will not be remembered between sessions. Available columns are determined by the record type, and cannot be changed.
Clicking on a tile widget will run the Saved Query that populates the widget, and show the results in the Enquiry module.
Instant reports
In grid widgets containing Items records, click  to generate an Instant report.
Process a transaction
If the record type in a widget has an associated action, click  to process a transaction. For example:
- For the Shelf Check Assigned widget you can complete the assignment.
- For the Review approval widget you can approve, decline or delete the comment.
- For the Borrower registration approval widget you can approve or decline the registration.
The  icon will appear for the following widgets:
- BRWREGAPPROVAL - Borrower registration approval
- BRWRESIGNAPPROVAL - Borrower resignation approval
- RVWCMT - Review approval
- SLFCHK - Shelf check assigned
- WAIVEAPPROVAL - Waive request approval.
Options
All record types will have the  icon at the end of each row. The options available depend on the record format being returned in the widget. The options available are those available in the action bar at the Full Display of the record type in Enquiry. For example:
- Item records in the Shelf Check Assigned widget, options to view, edit, delete, issue or return the item
- Comment records in the Review approval widget, option to view the comment.
- Borrower records in the Borrower registration approval widget, options to view, edit reservations, edit charges, edit registration details,load borrower details.
