This topic describes how you can stocktake. Here's a summary of the workflow we'll be following.
- Set up parameters.
- Return all items.
- Use Enquiry to search for missing items.
- Create a SavedList of missing items, and download this list to a file on the PC.
- Use Microsoft Excel to format the file as a “shelf list”.
- Review the shelf list.
- Apply the “missing at stocktake” status to the items in the SavedList.
- Use the shelf list to check for items on the shelf.
- Delete "missing at stocktake" items.
- Generate reports.
You can do stocktaking across all branches and/or collections, or just specific locations and/or collections. The basic process is the same.
When you’re returning items, it’s important to include all display areas and workroom areas. Make sure to reapply all relevant statuses, e.g. being repaired, after returning. And make sure no reservations remain allocated (reapplying the statuses will see to that provided that the item status processing parameters are set up correctly).
It’s probably a good idea if the generation and review of the shelf list is done by one person. This same person should also be responsible for setting the “missing at stocktake” status against the items.
Set up parameters
Set Do not update last sighted date and time during stocktake to Yes. This means an item’s last sighted date and time will not be updated when returned during stocktake.
Return all items
Take note of the date that you started stocktaking as this is used later in the process, i.e. the date you started returning items as part of stocktake.
- From the Module Menu select Circulation > Returns.
- Select Other > Local Settings and select Stocktake.
- Select a particular collection if you wish. This would then find any that have been mis-shelved — an alert will pop up if the item you are returning belongs in another collection. In the example below we've specified “Adult Fiction” as the collection.

- Return each item on the shelf. Because we selected Stocktake in the Local Settings, returning the item will set the last stocktake date.
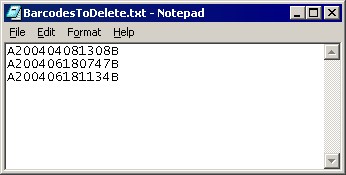
Items can also be returned in a batch. For example, you might use a hand-held reader to record the accession number of each item on the shelves, and then transfer this information from the reader to a PC. The file of items to return is just a text file with accession number, carriage return, accession number, carriage return, etc, for example:
Use Enquiry to search for missing items
Once all items have been returned at all locations, search for the items that have a last stocktake date earlier than the one you’ve just carried out. You can do this in Enquiry.
- From the Module Menu select Enquiry > Circulation > Item > Item Search.
- Set up your search criteria like this.
- Location. Choose the location or locations that you are stocktaking.
- Collection. Choose the collection or collections that you are stocktaking.
- Date first available. Specify <TODAY, i.e. we only want items that should be on the shelf.
- Last stocktake date. Specify a date earlier than the date you started returning items. For example, if you started returning items on 1/12/18 then specify <1/12/18 as the last stocktake date.
- Onloan. Set this to No to exclude items that are currently on loan.
- Allocated. Set this to No to exclude items that are on the reserve shelf.
- Intransit. Set this to No to exclude items that are intransit from one branch to another.
- Click Submit.
Now we want to remove any items from the search result that have an item status.
- Click Refine Set.
- Select the Not the following option.
- Select all the item statuses in the Status list. A quick way to do this is to click the first status, scroll to the end of the list, hold down the SHIFT key and click the last status.
- Click Submit.
Create a SavedList of missing items and download to a file on the PC
Now we will create a new SavedList of these missing items, download these items to a file, and then use this file as a shelf list to check for items still on the shelf.
- Open the User Menu.
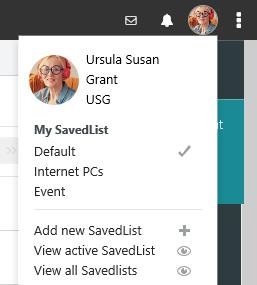
- Click Add New SavedList, enter the name for the SavedList and click Add.
- Click Save All.
- Click View Active SavedList on the User Menu.
- Select the Download option and the CSV format. This format is suitable for display in spreadsheet or database applications.
- Click Submit. Downloading the SavedList is a “task”, so a window pops up to show the progress. Details are refreshed until the task is completed.
- Once the task is finished, right-click the Right-click to save file link, and click Save Target As. Choose a location for your file. Any stocktaking files you create should be stored together in a single folder. Give the file a name such as “All Items” or, if you are stocktaking by collection, you might give the file the name of the collection.
- Click Save.
Use Microsoft Excel to format the file as a shelf list
Now let’s take a look at the file we’ve downloaded.
- Once the download is complete, open the file in Microsoft Excel.
- The file has a lot of information. Most of it we don’t need for our shelf list, so let’s delete all the columns except for:
- Title.
- Accession number.
- Acquired.
- Last Issue/Return.
- Call number.
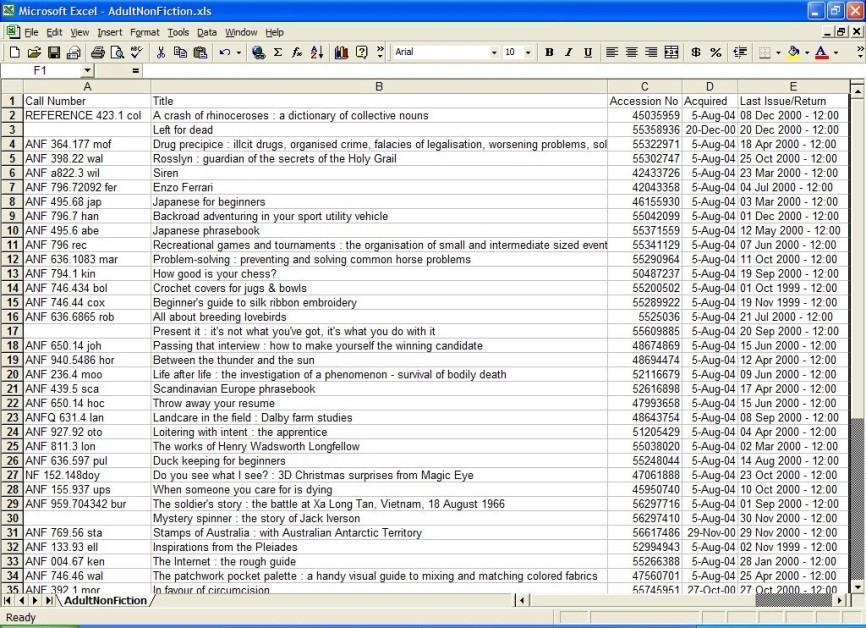
Then move the call number column to be the first one in the report — just to make it easier to use. The report now looks like this:
- At this point it’s probably a good idea to save the file as an Excel spreadsheet — at the moment it’s still a CSV file. So, select Save As from the File menu, and then save the file. Be sure to choose .xls as the Save as type.
Review the shelf list
Before you continue with the next phase it’s probably a good idea to review your shelf list and make sure it looks correct, e.g. check to see if a collection has been missed. If the shelf list doesn’t look correct, you’ll need to do another item search and create a new SavedList, e.g. return the items in the collection that’s been missed, search for missing items, create a SavedList, and generate a new shelf list.
Apply "missing at stocktake" status to items in the SavedList
Once you are happy with your shelf list, apply a Missing at stocktake item status against the items in the SavedList. Do this using Circulation.
- From the Module Menu select Circulation > Item > Bulk Item Maintenance.
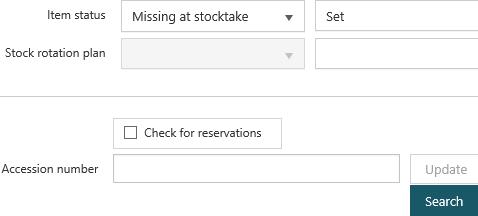
- Select "Set" and select "Missing at stocktake" as the Item status.
- Click Search and find your SavedList, e.g. go to Operations > SavedList Search.
- Click View SavedList Records > Select Set to set the status against all the items in the SavedList.
Use the shelf list to check for items on the shelf
Use the shelf list to check your shelves, i.e. to find any that somehow slipped through the net. If you find any of the listed items then return them. The item status processing parameters are set up such that returning the item will remove the "Missing at stocktake" status.
Delete "missing at stocktake" items
Now let’s delete the items that still have a "Missing at stocktake" status, i.e. the items that we haven’t been able to find. Do this using the Circulation module.
- From the Module Menu select Circulation > Item > Bulk Item Deletion.
- Click Search and find items with the status "Missing at stocktake", and click Submit.
- Click Select Set to delete these items.
Generate reports
You can generate a report on deleted items in the Reports module.
Alternatively you can search for deleted items in Enquiry and then create a report showing how many items have been deleted from each location and collection, and the value of the stock.
- From the Module Menu select Enquiry > Circulation > Item > Deleted Item Search.
- Specify the Date deleted to find the ones you want.
- Create a SavedList of these items, download the file and save it to PC.
- Open the file in Microsoft Excel and delete all the columns except for location, collection and price.