In This Topic
To add details of a new event:
- Do any of the following.
- From the Module Menu select Events, and then New (on the Navigation menu on the left) and then Event.
- From the Module Menu select Events, and then New (at the top of the Landing Page).
- If viewing the Event List, click New at the top of the page.
- Fill out each section as required. Expand the headings below for additional detail on each section.
- Click Save or Save & Close.
It is also possible to copy an existing event record. Any existing event (past or future) may be copied, and most details will be inherited to the copied event. See the
Copy Event heading below.
| Select the type of session and give it a Title and (optionally) a Description. The Description may be composed with formatted text using the styling options, or may be composed in HTML using the View HTML option. |
 |
images/EVENTS_NEW_DESCRIPTION_thumb.png 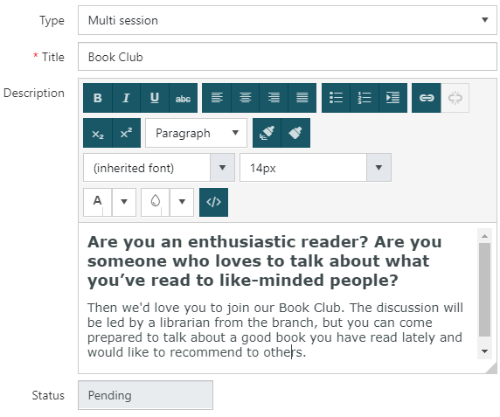 Click image to enlarge
Single session
You might select SINGLE session for a one-off event, like an author talk. Creating a single session event automatically creates one session, and this session inherits all the information from the event. You can always add multiple sessions for the event later if you wish.
Multi session
You might select MULTI session for an event with multiple sessions. Creating a multi session event does not automatically create any sessions. You create the sessions manually.
The sessions inherit all the information from the event except for the start and end dates, so it should be quick and easy to create new sessions without having to re-enter the same information again and again. But you can change the information in the session if you wish, e.g. change the presenter, assign to another staff ID, give the session its own title or description, etc.
For Multi session events, the sessions are not automatically created (as they are with single session and recurring events). Each session must be added manually (using Manage sessions > New), and each session must be Approved before it will display at the OPAC.
Recurring session
You might select RECURRING session for an event with regular sessions, e.g. a book club. When you approve a recurring session event, this will automatically create all the sessions between the start and end dates, and each session will inherit all the information from the event. You can always add more sessions for the event later if you wish.
Location & Location note
The Event locations are specified on the Details tab in locations. You'll see these in the event details. The event locations are held in the EV lookup table.
The Location note might include details on directions or landmarks, parking, entry points etc for the event.
Online event
This feature requires server version 10.9 or higher. |
Events that are being hosted online may be flagged as an Online event.
- At all instances of display (OPAC & staff interfaces), the event will be flagged as online
- The Online facet in event searches at the OPAC allows events flagged as online to be filtered in or out of a set
- In place of location information, the Online event text will be displayed
- The Online event flag may be set independently on Events and Event Sessions (i.e. some sessions in a series may be online and others not)
Start/end date & time
Set the Start/end date and the Start/end time. You can select All day event if you don’t want to specify a start and end time. You can select a time from the dropdown list. Or you can enter another time if you wish — separate the hour and minute with a colon, e.g. 10:15.
The End date defaults to the Start date because, in most cases, the event will start and end on the same date. If you’re creating a recurring event then the end date would be different from the start date, and we’d automatically creating all the recurring events between the two dates.
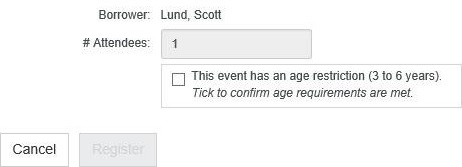
Minimum and Maximum age
Set a Minimum/maximum age if you wish. When you try to register for a session in OPAC, you’ll need to confirm that the age requirements have been met, for example:
Feature flag
Set the Feature flag if you want the event to be featured/highlighted in OPAC Featured Events container.
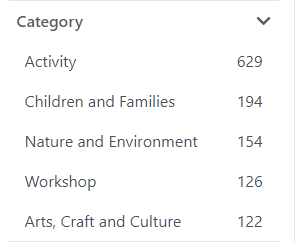
Categories & Audience
The options for Category and Additional categories are set up in the EVCGY lookup table.
Options for Audience are set up in the EVAUD lookup table. These can be maintained using the Table Manager.
Events searches at the OPAC can be filtered using facets based on both Category and Audience.
Survey URL
You might set up a survey (e.g. using SurveyMonkey) and then, once the event has been completed, send a survey email to those who attended.
Reminder text
This feature requires server version 10.9 or higher. |
An Event Reminder notice will be generated for borrowers who have registered for the event, the specified number of days before the event - see the Reminder (days) in the Registration Details section.
The Reminder text composed in this section will be included in a Reminder details section in the notice.
Select options in the OPAC section to choose if/when an event will be displayed at the OPAC.
OPAC filter
The OPAC filter dropdown menu contains a number of options for nominating the OPAC display status of an event.
| None |
The event will be displayed at the OPAC once it has been Approved (i.e. no additional filter will be applied). |
| Suppress from OPAC |
The event will not be displayed at the OPAC. |
| Display date |
Selecting this option will reveal an calendar date picker. The event will be displayed in the OPAC from the date selected. |
| Display days before |
Selecting this option will reveal a field where a positive number may be entered. The event will be displayed in the OPAC the nominated number of days before the event start date. |
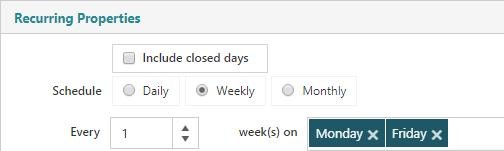
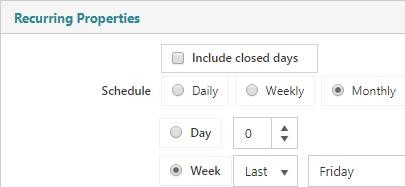
Select Include closed days to create sessions for days when the location is closed.
Sessions may be scheduled to be Daily, Weekly or Monthly.
- If Daily is selected, a session will be created for every day between the start and end dates.
- In the example below, sessions have been set to Weekly on Mondays and Fridays. A session will be created for every Monday and Friday between the start and end dates of the event.
- In the example below, sessions have been set to Monthly, on the last Friday of every month. A session will be created for the last Friday every month between the start and end dates.
Click Select files... to browse and find an image.
- Images are not required to be in specific dimensions
- Images will be scaled based on the original dimensions (i.e. will not be scaled to a square if the original dimensions are rectangular)
- Images will be scaled based on the display are (e.g. Brief Display image will be smaller than Full Display)
- .PNG image files are recommended for image scaling
Unique Session Images
This feature requires server version 10.9 or higher. |
In some cases it may be preferable to have unique images for multiple sessions of an event (e.g. each author's portrait for a series of author talks).
To add an image specific to an Event Session, use the Manage Session interface to update the Images section.
|
Attachments may be added to Events, and may either be made publicly available, or restricted to staff with access to the Events module. Examples of attachments might include:
- Meeting agenda items
- Ticketing terms and conditions
- Waiver forms for sports activities
To add an attachment:
- Click the Add button.
- Select the file to be attached, either by;
- clicking Select file, browsing to the file's location and clicking Open, or
- dragging and dropping the file onto the indicated area
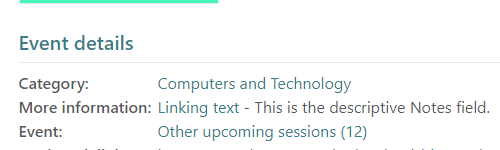
- Enter the Linking text, which will be displayed instead of the file name at the Event record display (in both OPAC and staff interfaces).
- Enter a Note to describe the content of the file. This will be appended to the Linking text.
- If the file is to be accessible by borrowers at OPAC, check the Public access flag option.
- Click OK, then click Save.
In the Spydus web-based app, attachments may be downloaded from the Event record Full Display, or from the Event Edit interface.
In the OPAC, attachments may be downloaded from the Event record Full Display. |
images/EVENTS_ATTACHMENTS_thumb.png 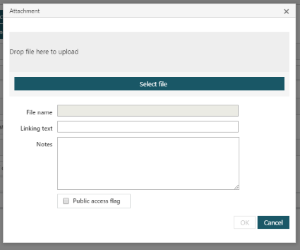 Click image to enlarge
|
If attendees must register to attend the event, select Registration required. Selecting Registration required will reveal a large suite of additional options.
images/EVENTS_REGISTER_REG_DETAILS_thumb.png 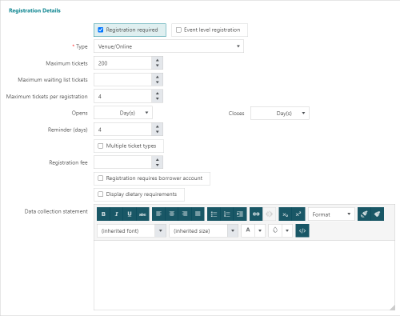 Click image to enlarge
Event level registration
If Event level registration is selected, attendees only need to register once - at the event level - to be registered for all sessions of the Event.
If Event level registration is not selected, and attendees wish to register for multiple sessions, these registrations must be made individually.
Type
The registration Type specifies whether attendees are able to register Online (at the OPAC), at the Venue, or both.
The options for this field are in the EVRT lookup table. |
Maximum ticket numbers
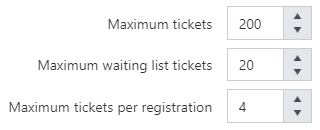
Maximum tickets
The number Maximum tickets is how many attendees may be registered per session. Once the maximum is reached, any further registrants will have the option of being placed on a waiting list (see Maximum waiting list tickets below).
If the Maximum tickets is increased - or if previously confirmed registrations are cancelled - registrants will be moved from “On the waiting list” to “Confirmed” or “Pending payment”.
Maximum waiting list tickets
Set the Maximum waiting list tickets to limit the number of registrants that may join the waiting list once the maximum registrations has been reached.
Maximum tickets per registration
The Maximum tickets per registration specifies the maximum number of registrations that may be made in a single transaction.
Registration Open & Close
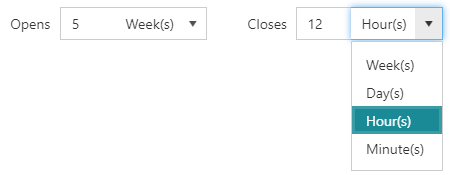
The time & date that registration Opens and Closes may be specified. Both of these times are relative to (before) the start time of the event.
Staff can override these times by registering in the Events module, but registration via the OPAC will not be available until the Opens time, and will not be available after the Closes time.
If the Opens and Closes times are not specified, registration will open once the event is approved, and will close at the Start Time of the event. |
Reminder (Days)
Reminder (Days) is the number of days before an Event Session that a reminder will be sent to those with a Confirmed registration.
The content of the reminder email may be customised in the Events tab of the HTML Email & Slips Configurator. If included in the event Details section above, the Reminder text can be used to provide additional information on the event in the reminder notice.
Multiple ticket types
This feature requires server version 10.9 or higher. |
The Multiple ticket types option allows tickets to be sold for different sections, different ages, concession pricing etc.
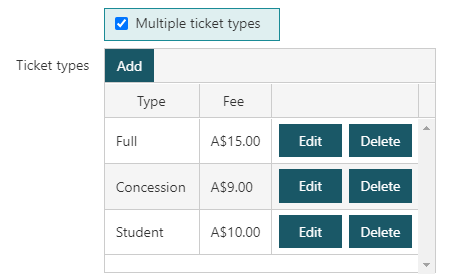
To add ticket types;
- Check the Multiple ticket types option to reveal the Ticket types table.
- Click the Add button.
- Select a Type and enter the Fee for that ticket type, then click OK.
- Repeat until all required ticket types have been added.
All information on tickets purchased, their types & costs, will be displayed:
- in registration emails,
- in the borrower account at the OPAC,
- at the Full Display of the registration record.
The available Types are maintained in the TCKT (Ticket Type) table in Table Manager. |
Registration fee
The Registration fee will be the amount payable to confirm event attendance.
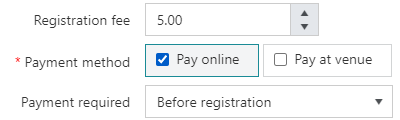
- If a Registration fee is set, the options to Pay online or Pay at venue will be revealed
- If the Pay online or Pay at venue flags are set, the Payment Required dropdown will be revealed
| Not required before event |
Users may register without payment and will not be required to make payment before attending the event. The registration status will remain Pending Payment until payment is completed. |
| Before event |
Users may register without payment but will be required to make payment before attending the event. When marking attendance, a critical alert will be displayed if a registration is in the Pending Payment status. |
| Before registration |
Users must make payment at the OPAC to complete registration, at which point the registration status will be Confirmed (only available if Pay online is checked). |
- The Charge code used as the Registration fee may be chosen in Events General Parameters. By default, the EVREG Charge code will be used.
- If using Multiple ticket types for an event, the Registration fee option will be hidden, and registration fees will be set in the Ticket types table.
- If a ticket price is left null or set to zero, there will be no amount displayed in the Fee column.
|
Registration requires borrower account
If Registration requires borrower account is selected, registration will be restricted to registered borrowers (i.e. no guest registration).
Display dietary requirements
If selected, the Display dietary requirements option will allow registrants to select from the configured Dietary requirements options.
The dietary requirements options that will be available to borrowers are maintained in the EVDTR table in Table Manager. |
Data collection statement
If a Data collection statement is entered in the rich-text field, it will be displayed on the registration page.
When a Data collection statement is displayed at the registration page, it must be accepted in order to confirm registration.
The Data collection statement will be shown at:
- New/Edit Event and Event Session screens where it can be updated
- Registration screens at OPAC and WBA for display - acceptance required to complete registration
- Event, Event Session, and Event Registration record Full Display - display only
|
If required, enter the Contact Details for a contact associated with the event.
Select Staff display only if the contact details are only to be displayed to staff, not in OPAC.
Fill in this section if you want to assign the event to a particular staff member.
Copy Event
In some circumstances, it may be easier to copy an existing event rather than create a new one. For example, if an event runs each school term, or if an event was cancelled and is now being rescheduled.
A copied event will retain all details from the source event, with the exception of:
- the Start date and End date
- the Start time and End time
Copied details include Recurring Properties.
To copy an event:
- Navigate to the Events module. Then, either:
- select the tile where the event to be copied is located
- click Go to List, then Add to List, to retrieve the event to be copied
- using the Event Search form, find the desired record, select it and click Select Record
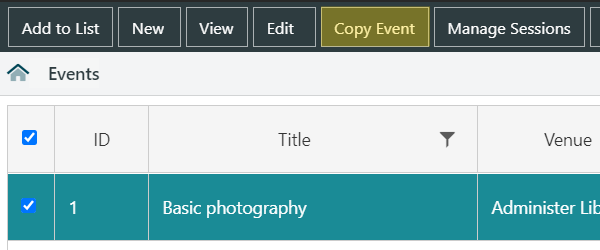
- In the list, select the event to be copied, then click the Copy Event button in the action bar.
- Review the event details and update or correct them as required.
- Ensure that the Start date/time and End date/time are set.
- Click Save or Save & Close.