When you start a new session and select Acquisitions from the Module Menu then the default page is the Order List. You can search for existing orders and add them to the list, or create a new order to add to the list. From the Order List you can complete, cancel, confirm or delete orders; add orders to a PO or an invoice; check in items and manage receipts; manage issues; renew subscriptions, and check the budget status for the funds on an order.
We retain the contents of the Order List when you switch to another module or log off, so you'll see the list as it was when you switch back to Acquisitions or log on again.
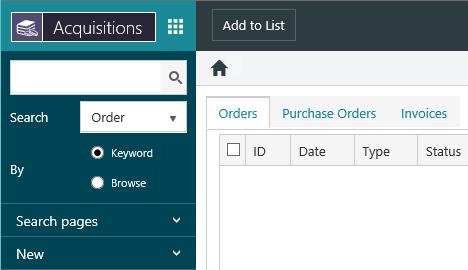
Add existing orders to the Order List
To add existing orders to the Order List:
- From the Module Menu select Acquisitions.
- Click Add to List to display the search page, and find the order or orders you want. For example, you might search for all pending orders for a particular vendor. When you have a set of records displayed, do one of the following.
- Click Select Set to add all the records in the set to the Order List.
- Click the checkbox next to the records you want, and then click Select Records to add just those records to the Order List. You can select records across pages. At the bottom of the browser you'll see the number of records selected. You can click Clear to deselect all the records.
- Display a record in full, and then click Select Record to add just this record to the Order List.
You can also add existing orders to the Order List using a SavedList.
- From the Module Menu select Acquisitions.
- Click Add to List to display the search page.
- Click SavedList Search on the Operations menu, search and find the SavedList you want, and then view the SavedList records.
- Do one of the following.
- Click Select Set to add all the records in the SavedList to the Order List.
- Click the checkbox next to the records you want, and then click Select Records to add just those records to the Order List. You can select records across pages. At the bottom of the browser you'll see the number of records selected. You can click Clear to deselect all the records.
- Display a record in full, and then click Select Record to add just this record to the Order List.
The records in the Order List will still be there if you switch to another module (e.g. Cataloguing or Circulation) and then back to Acquisitions again.
Sort the Order List
You can sort the Order List by clicking a column heading. For example, if you want to sort by order date, click the Date column heading once to sort the list in ascending order and then click a second time to sort in descending order.
Select orders in the Order List
To select one order:
- Click the checkbox next to the order you want.
- Click anywhere in the row except the checkbox. This will automatically deselect any other orders that are currently selected.
To select multiple orders:
- Click the checkbox next to each order you want.
- Use SHIFT+Click to select consecutive orders. Click anywhere in the row except the checkbox. Click the first row you want, press and hold SHIFT and then click the last row you want.
- Use CTRL+Click to select specific orders. Click anywhere in the row except the checkbox.
Select or deselect the checkbox in the first column heading to select or deselect all the orders.
View an order in the Order List
To view details of an order:
- Select the order you want.
- Click View or right-click and click View.
Edit an order in the Order List
To edit an order:
- Select the order you want.
- Click Edit or right-click and click Edit.
- Make your changes.
- Click Save & Close to go back to the Order List.
Remove orders from the Order List
Removing an order from an Order List does not cancel or delete that order. It simply removes it from the Order List. It can still be retrieved when you search for it in Staff Enquiry.
To remove unwanted orders from the Order List do any of the following.
- Click Remove All to remove all orders.
- Select the order or orders you want, and then click Remove. You can also right-click and click Remove.
Copy orders in the Order List
To copy an existing order or orders to create new ones:
- Select the order or orders you want.
- Click Copy or right-click and click Copy. The new orders are shown at the top of the Order List.
This copies all the details from the original orders except for the reservations and requestor.
If you copy multiple orders then we'll automatically generate an ID for each one. If you copy one order then it will be opened in edit mode, and you can assign an ID or generate a system-assigned one.
If the order you copy has the status "Confirmed" then the new order will have the status "Pending".