To display the Event List:
- Click a card on the dashboard, or
- Click Go to List on the dashboard.
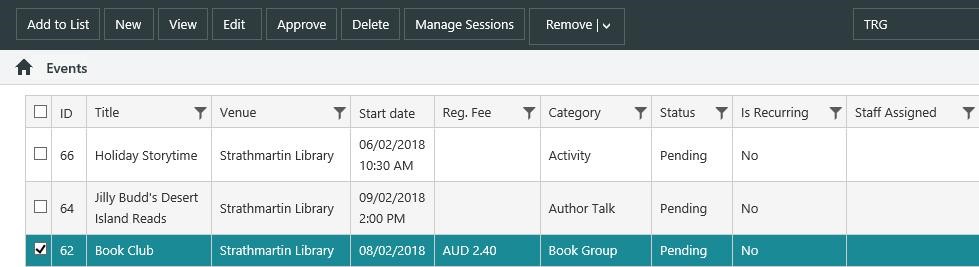
Here’s an example Event List.
Add existing events to the Event List
To add existing events to the Event List:
- Click Add to List to display the Events search page, and find the event or events you want. For example, you might search for all the events assigned to you. When you have a set of records displayed, do one of the following.
- Click Select Set to add all the records in the set to the Event List.
- Click the checkbox next to the records you want, and then click Select Records to add just those records to the Event List. You can select records across pages. At the bottom of the browser you'll see the number of records selected. You can click Clear to deselect all the records.
- Display a record in full, and then click Select Record to add just this record to the Event List.
You can also add existing events to the Event List using a SavedList.
- Click Add to List to display the search page.
- Click SavedList Search on the Operations menu, search and find the SavedList you want, and then view the SavedList records.
- Do one of the following.
- Click Select Set to add all the records in the SavedList to the Event List.
- Click the checkbox next to the records you want, and then click Select Records to add just those records to the Event List. You can select records across pages. At the bottom of the browser you'll see the number of records selected. You can click Clear to deselect all the records.
- Display a record in full, and then click Select Record to add just this record to the Event List.
The records in the Event List will still be there if you switch to another module (e.g. Cataloguing or Circulation) and then back to Events again.
Add a new event to the Event List
Click New to create a new event and add it to the list. Click here for details of the fields to be filled in.
Sort the Event List
You can sort the list by clicking a column heading.
Select events in the Event List
To select one event:
- Click the checkbox next to the event you want, or
- Click anywhere in the row except the checkbox. This will automatically deselect any other events that are currently selected.
To select multiple events:
- Click the checkbox next to the events you want.
- Use SHIFT+Click to select consecutive events. Click anywhere in the row except the checkbox. Click the first row you want, press and hold SHIFT and then click the last row you want.
- Use CTRL+Click to select specific events. Click anywhere in the row except the checkbox.
Select or deselect the checkbox in the first column heading to select or deselect all the events.
View an event in the Event List
To view details of an event:
- Select the event you want.
- Click View or right-click and click View.
Edit an event in the Event List
Select an event and click Edit to edit details. Click here for details of the fields.
|
You can also edit an event from Enquiry. For example, use Enquiry > Events > Event to find the event you want. From the Full Display, click Edit Record to edit details of the event or click Add Session to add a new session for this event. |
Approve/Unapprove an event in the Event List
Approving an event automatically approves all the existing sessions for that event.
To approve events:
- Select the event or events you want.
- Click Approve or right-click and Approve.
To unapprove approved events:
- Select the event or events you want.
- Click Unapprove or right-click and Unapprove.
Cancel an event in the Event List
Only approved events can be cancelled. When you cancel an event, any approved sessions for that event are cancelled and any pending sessions for that event are deleted. A cancellation email notice is automatically sent to the registrants for the cancelled sessions.
You can’t add new sessions for a cancelled event.
To cancel events:
- Select the event or events you want.
- Click Cancel or right-click and Cancel.
- Enter a status note if you wish, and then click OK.
|
If an Event has been cancelled, some details are unable to be edited. |
Postpone an event in the Event List
|
This feature requires server version 10.9 or higher. |
| Events & Event Sessions may be postponed, which will trigger an Event/Session Postponed notice to advise any registered attendees that the event or session has been postponed. |  |
The Postpone action will be available in the Event list for:
| Event Type | Where... |
| Single-session Events |
...the Event is Approved, and is not complete. |
| Multi-Session Events | ...the Event is Approved, and at least one session is not complete. All child sessions that are not complete will be postponed. |
To postpone events:
- Select the event/s to be postponed in the Event List.
- Click the Postpone button in the action bar, or right-click and Postpone.
It is advisable to update the event details immediately before or after postponing the event to provide details on the postponement.
|
Recurring Events cannot be postponed from the Events list. Sessions in a Recurring Event series may be Postponed from the Manage Sessions page. To postpone selected sessions in a Multi-Session event, select those sessions from the Manage Sessions page. |
Postponed events will continue to be displayed at the OPAC, along with any updated details.

Updating a postponed event
Event details may be updated as normal while the event is postponed.
When an Event or Session that was Postponed is re-scheduled and Approved, an Event/Session Details Update notice advising of the new date will be triggered for any registered attendees.
Registrations for postponed sessions
While a session is postponed, OPAC registration will be prevented.
Existing registrations will remain linked to the sessions, and those who have registered will be notified with an Event/Session Details Update notice if the event is re-scheduled and subsequently Approved.
If the event goes on to be cancelled, those who have registered will be notified with an Event Cancellation notice.
Re-approving a postponed event
To re-approve an event that has been postponed, select the event in the Event List and click the Approve button.
Close/open an event in the Event List
You can specify the dates when registration opens and closes in the event details. You can use Close Event to manually close an event so that no registrations are possible in OPAC. Staff can still add registrations manually if they wish. You can use Open Event to re-open registration for a closed event.
|
Closing an event does not close the sessions. You’ll only see the option to Close Event if:
|
To close events:
- Select the event or events you want.
- Click Close Event or right-click and Close Event.
To re-open closed events:
- Select the event or events you want.
- Click Open Event or right-click and Open Event.
Delete an event in the Event List
You can delete an event if it’s pending, and if it has no sessions.
To delete events:
- Select the event or events you want.
- Click Delete or right-click and Delete.
Manage sessions for an event in the Event List
Select an event and click Manage Sessions.
Manage registration for an event in the Event List
If Event level registration is selected, then you’ll see the Manage Registration button when you select an approved event.
Remove events from the Event List
|
Removing an event from an Event List does not cancel or delete that event. It simply removes it from the Event List. It can still be retrieved when you search for it in Staff Enquiry. |
To remove an event from the Event List:
- Click Remove All to remove all events, or
- Select the event or events you want, and then click Remove. You can also right-click and Remove.