Add a new charge
To add a new charge:
- Display the Charges dialog.
- Click Add Charges.
- Select the charge you want in the Description, specify the amount, add a note, etc.
- Click Add to add this charge.
Edit the notes for a charge
To edit the notes for a charge:
- Display the Charges dialog.
- Select the charge you want.
- Click Edit, make your change and click Update.
Delete charges
To delete charges:
- Display the Charges dialog.
- Select the charge or charges you want to delete.
- Click Delete, and then click Yes at the confirmation prompt.
Add a deposit
Borrowers can choose to add a deposit on their account so that payment can be automatically made from their account when required. Whether a charge is paid automatically is specified in the Deposit level for each charge set up in the borrower category.
To add a deposit:
- Display the Charges dialog.
- Click the down arrow next to Add Charges, and then click Add Deposit.
- Select the type of deposit you want in the Description, specify the amount and click Add.
- Select the payment mode, and click OK.
Add a refund
To add a refund:
- Display the Charges dialog.
- Click the down arrow next to Add Charges, and then click Add Refund.
- Select the type of refund in the Description, specify the amount, add a refund note if you wish, and click Add.
If the borrower has money on account and no outstanding charges then you'll see the option to Close account on the Add Refund dialog. Select this option and the amount is automatically set to the value of the money on account. You can then click Add to refund this amount.
Link a refund to a previous charge
You can link a refund to a previous charge if you wish. To do this:
- Display the Charges dialog.
- Click the down arrow next to Add Charges, and then click Add Refund.
- Select the type of refund in the Description.
- Click the Previous charge button. This opens an in-app browser showing a list of the borrower's previous charges.
- Select the particular charge you want, and click Select Record at the Full Display.
- Add a refund note if you wish, and click Add.
Rather than use something like "General refund" as the refund type, you might want to add a new type and use this, e.g. "Refund previous charge".
Add an ad hoc charge for a borrower
To add an ad hoc charge for a borrower:
- Display the Charges dialog.
- Click the down arrow next to Add Charges, and then click Add Ad Hoc Charges.
- Double-click a charge in the Available charges to add it to the Applied charges list.
Once a charge is added to the Applied charges list, you can click the cursor in the Amount column and/or the Qty column to change the value.
You can click Add and then Add Refund to add a refund to the Applied charges list.
images/CIRC_AdHocCharges_106_thumb.png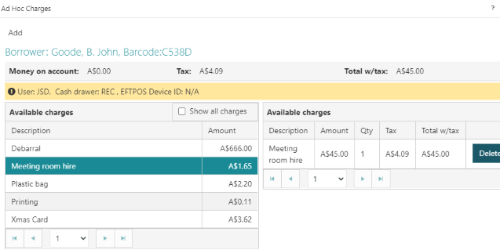
Click image to enlarge In the charge parameters you can specify which charges you'll see on the "main" dialog, and the default amount. Click Show all charges to list all the ad hoc charges.
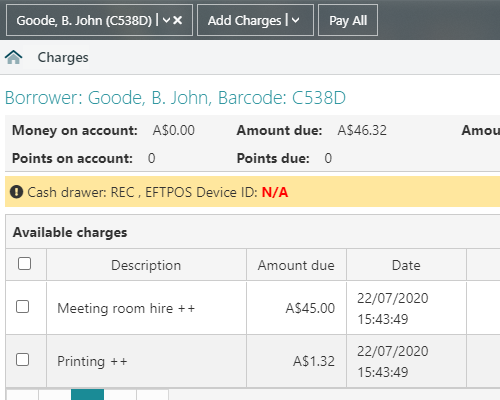
- Click OK to add the Applied charges. In the Description column we show ++ against the ad hoc charges.